How-To: Install a Plug-In Wall Sconce

A plug-in wall sconce is an ideal investment for anyone who wants to upgrade their lighting but doesn’t want to hardwire a fixture. Easy to install, portable lighting can fit with modern or traditional styles and can be mounted almost anywhere in your home. All you'll need is a power drill, a few mounting screws, drywall anchors, and your Schoolhouse wall sconce. Scroll below for our step-by-step guide to refresh your home without rewiring.

Take note that the instructions below are for removable bracket mounted fixtures. Installation instructions for our key-hole bracket mounted fixtures—namely our Donna, Simone, Eduard, Astrid, and Abrams plug-in wall sconces—can be found on the resources tab on their product pages. Additionally, this guide is for mounting the sconce using drywall anchors, but this isn’t the only method for mounting.
Drywall anchors greatly increase the stability of the fixture and virtually eliminate the possibility the fixture will pull out of the wall from accidental contact or daily use. If you prefer to use screws without anchors, you don’t need to pre-drill holes (unless you’re screwing into wood or another non-drywall material). With this method, we recommend putting screws in all six holes in the mounting brackets for optimum hold. Finally, we recommend using screws no longer than two inches to minimize the possibility of making contact with electrical wiring in the wall.
With that in mind, follow these simple steps and your sconce will be lighting up the room in no time.


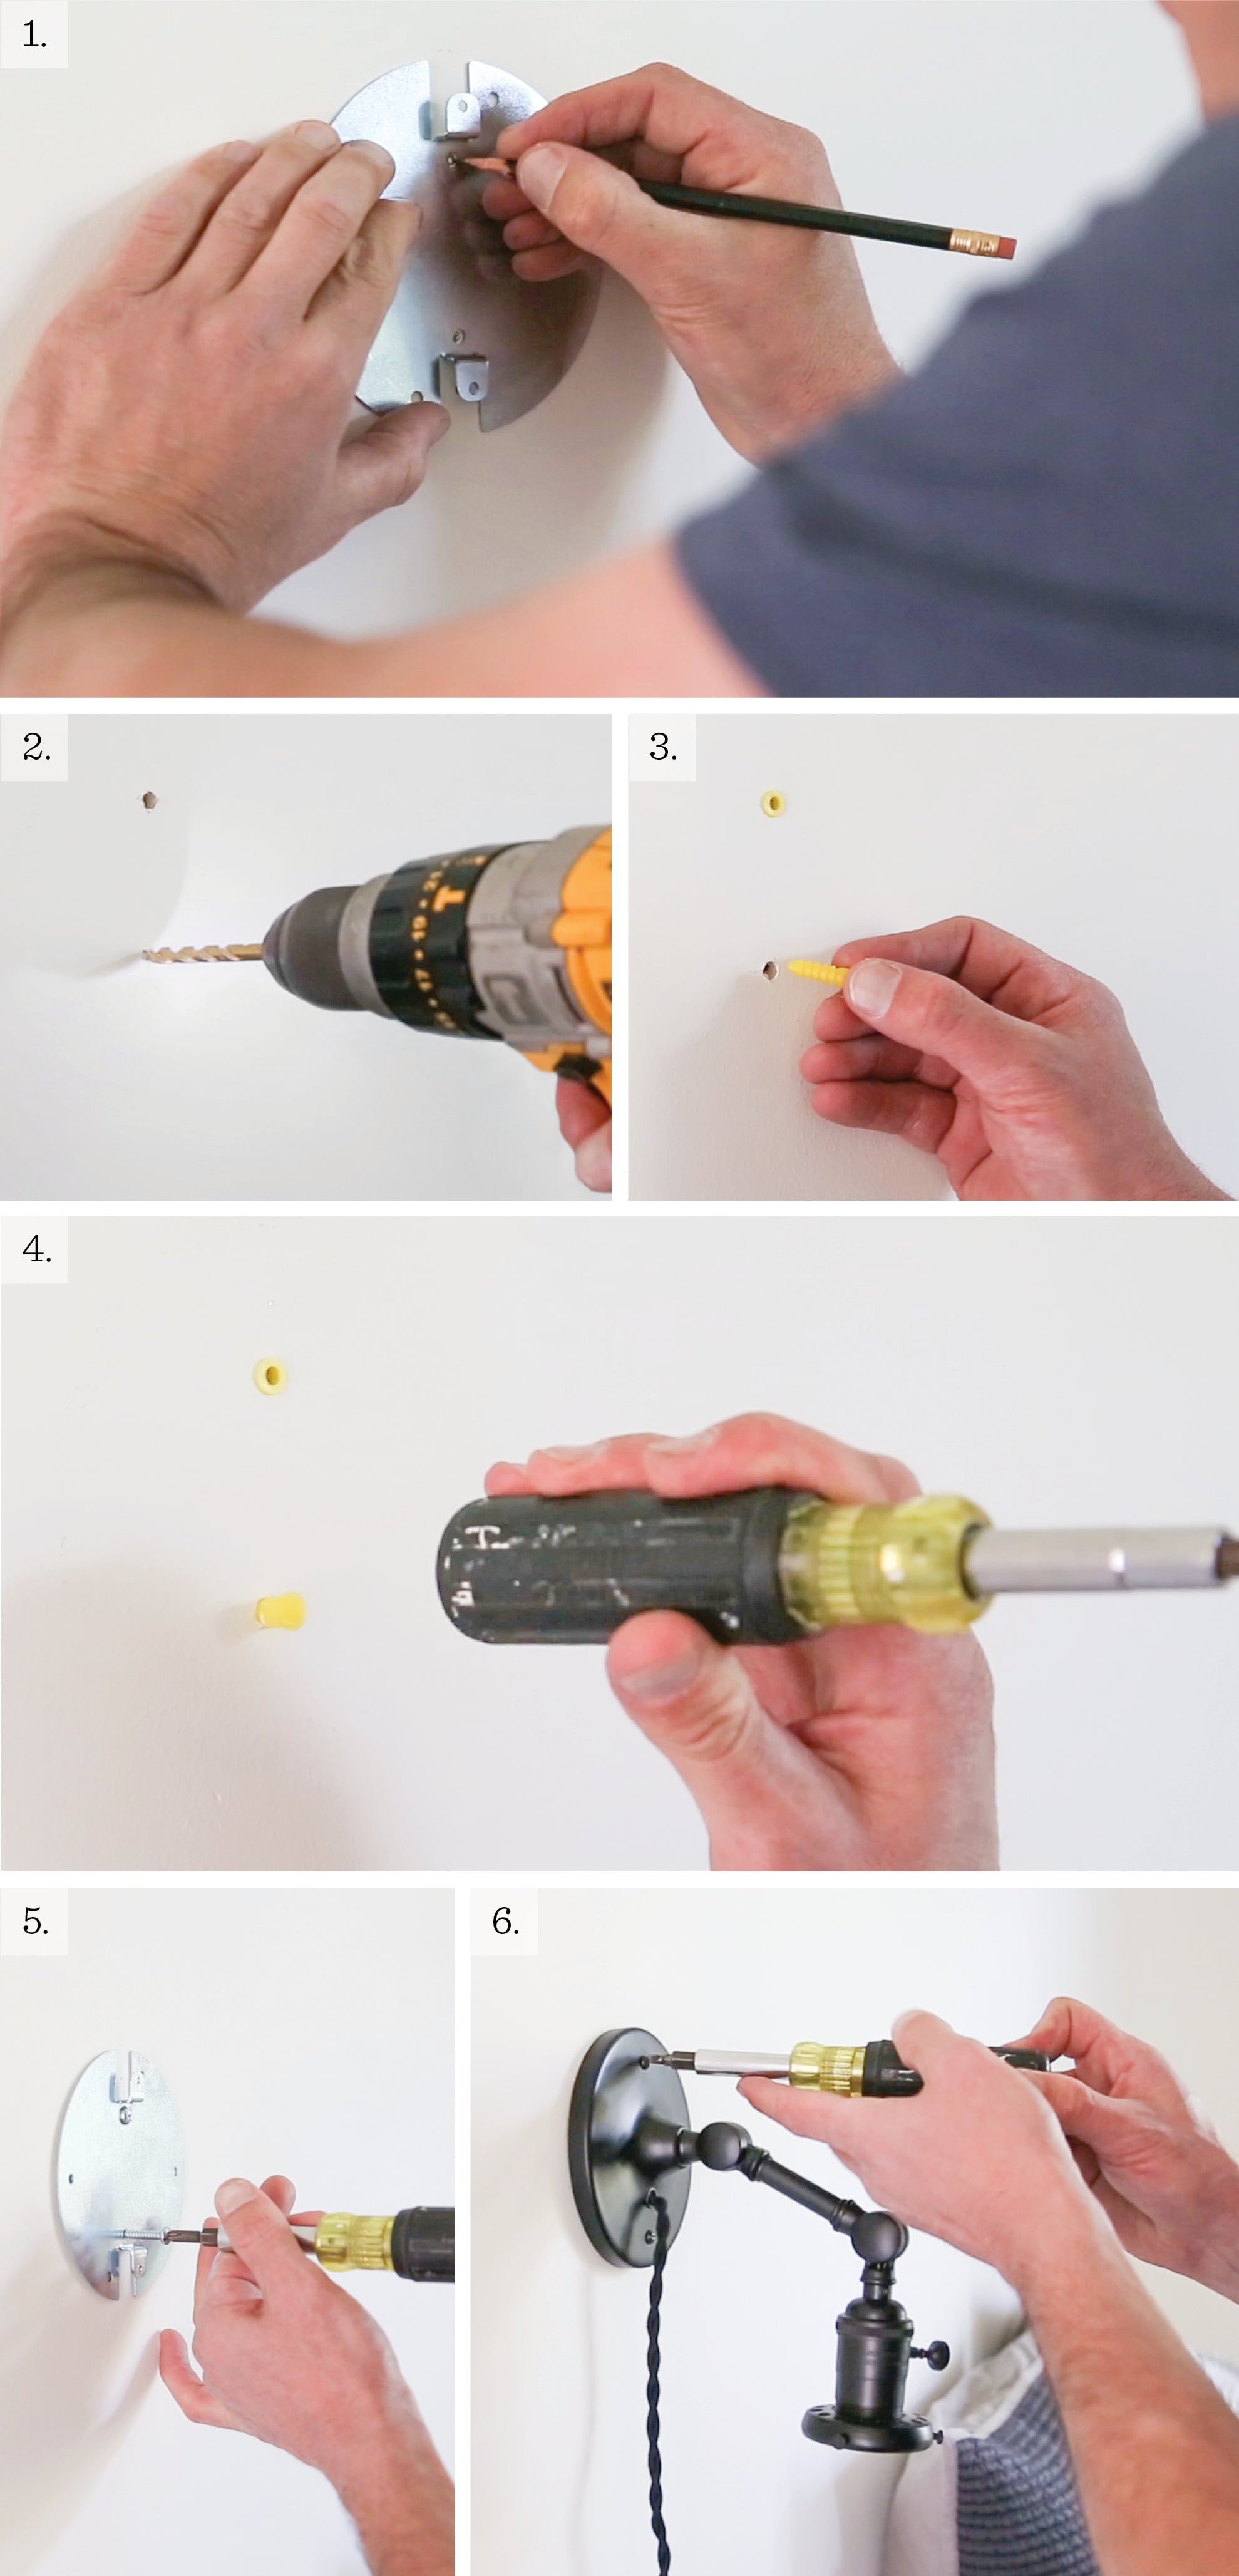
Step 1. To begin, remove the mounting bracket from the back of the sconce by unscrewing the screws. Use the mounting bracket to mock up the location of the sconce. Mark the wall through the holes in the bracket to line up where the anchor holes will go.
Step 2. Pre-drill holes in the drywall. Make sure the holes are smaller and shallower than the drywall anchor so it will have a firmer connection with the drywall.
Step 3 & 4 (pictured individually). Push in each drywall anchor and gently tap into place using a hammer or the back of a screwdriver. Note: the wall sconce kit does not come with screws or drywall anchors.
Step 5. Put up the mounting bracket and screw into the drywall anchors.
Step 6. Screw the canopy screws into the mounting bracket. We recommend using a screwdriver for this step to avoid over-tightening the screws which could damage the canopy or strip the screw threads. Note: Canopy screws are included with the wall sconce kit.


That’s it! For more plug-in lighting inspiration, read our guide here. And if you have any questions or run into any problems, feel free to reach out to our Customer Support Team.


